| Oakridge |

Oakridge Depot
 |
 |
 |
 |
 |
 |
 |

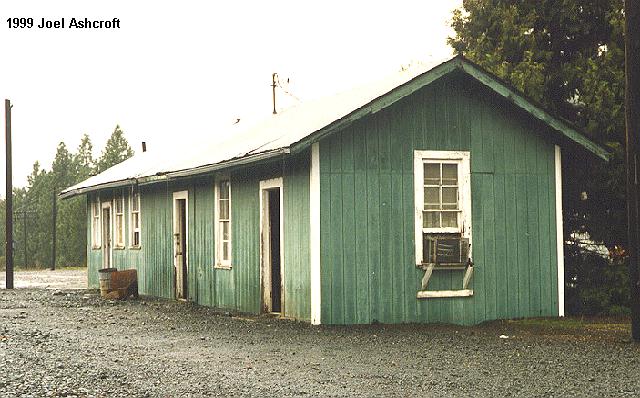
Here is a photo of the Oakridge depot. The structure was destroyed in 1979
shortly after the agents job was discontinued.
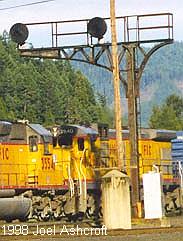
The Cascade Line uses this type of cantilever signal on just about every siding on "The Hill."
This particular is located at the west switch at Oakridge.
Various Yard Photos
 |
West switch Oakridge. In the past, there were two cantilever signal bridges at this location. The track to the right leads to Pope & Talbot. |
 |
View looking geographically east toward the RR west end of Oakridge Yard. This photo was taken from the overpass. |
 |
Looking toward the west end of the yard. Note the sandtower in the right of the photo. |
 |
View looking geographic west from the overpass. The stock yards are visibile in the foreground |
 |
West end of the yard looking west, taken from the west switch. |
 |
North side of the roundhouse taken from the Lane Electric pole yard. |
 |
Water and Oil Columns between tracks 2 and 3. The depot is to the right, out of view of the camera. |
 |
This building became the yard office once the Depot was removed in 1979. |
 |
East end of yard office looking toward Eugene |
 |
From left to right:motorcar shed, motorcar shed, ice house, firehouse |
 |
What's left of the sandhouse. Only the foundation exists today |
 |
Tail leg of the wye switch looking geographic north |
Water Tower Photos

Water Tower just before it was dismantled.
 |
 |
 |
 |
Pope & Talbot

In the early 70's, the track leading to Pope & Talbot was relocated where it crosses Beech Street. This view is taken from Beech St. looking toward Pope & Talbot.
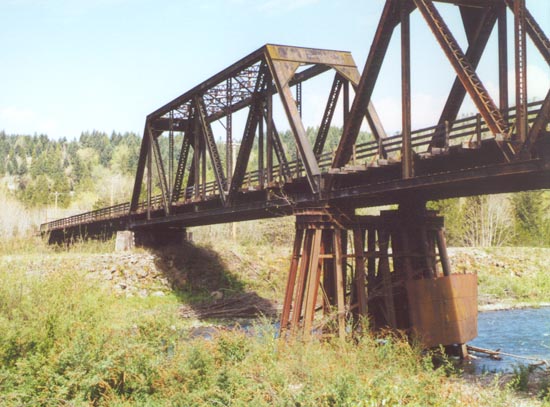
Located on the eastern edge of town was the Pope & Talbot lumber mill. The spur
line leading to the mill was about one mile in length and crossed Salmon Creek just
before arriving at the mill. Two 150' steel through truss bridges, one built in 1906, and the
other in 1907, were used for the crossing. The west approach to the bridge was built
using wood timbers.
 |
 |
 |
 |
 |
 |
 |
 |
East Oakridge
 |
East Switch looking Toward Tunnel #22. The track in the foreground leading to the left if the runaway track. |
 |
East Dual Control switch |
 |
East switch. The red arrows indicate the location of the spring which and the direction of track #2, which were all removed in 1987. |
Tunnel

F7 #6330 east waits for orders at the Tunnel trainorder office.
The east end of Oakridge was once the location of a train order office appropriately named "Tunnel" in relation to it being located near the west portal of Tunnel #22. This office was built to handle the increased traffic brought on by World War 2 and was removed shortly after the end of the war. At the present, there are no physical indications that Tunnel existed.
 |
East switch of Oakridge looking toward Tunnel, this shot was taken before CTC came to the area as indicated by the hand-throw switch. |
 |
Looking toward the location of Tunnel, taken from atop Tunnel #22. Note the siding leading off to the left of the mainline. |
Welcome to Joel's Southern Pacific in The Cascades! If you were directed to this portion of the webpage from an outside source, such as a different webpage, then please click the photo below to go the SP in The Cascades home page. |
 |
© Joel Ashcroft
